| Dome | Focuser | Switch |
|---|---|---|
 |
 |
 |
AlpacaPiDrivers |
|---|
| Home | SkyTravel | Drivers | Client Apps | Moon Phase | SkyImage | AAVSO |
|---|
The drivers are probably the most important piece to the puzzle. Once the driver is running for a particular device, then any program that speaks Alpaca can utilize that devices. This also includes a web browser. However you can not send action commands to the driver from a web browser. You can read all of the status.
The AlpacaPi drivers run on Linux and were designed with the Raspberry-Pi in mind. They will run on most any flavor of linux.
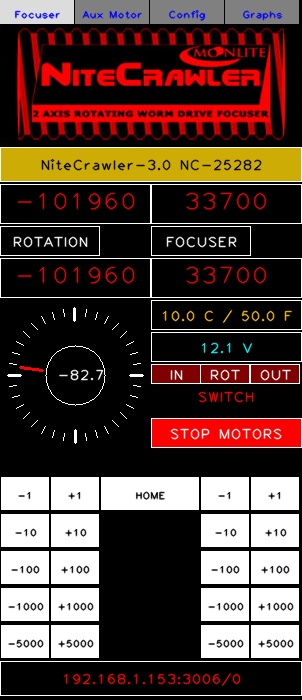
AlpacaPi drivers currently support the following devices.
For example, if you want to utilize the 4 port switch (described below), follows these steps:
| Dome | Focuser | Switch |
|---|---|---|
|
|
|
|
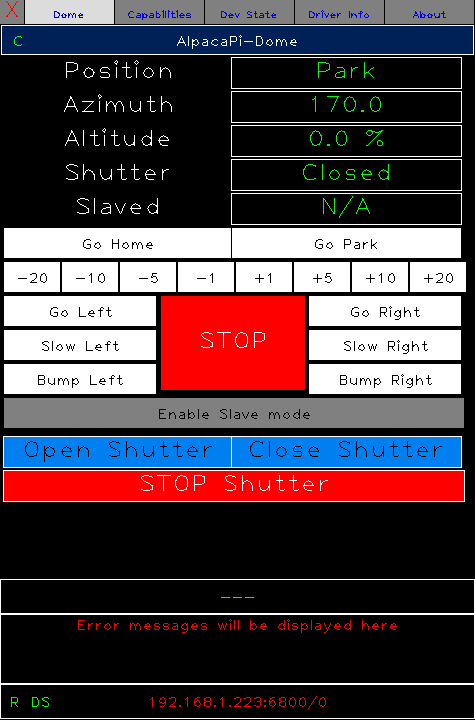
The SHUTTER devices is a non-standard Alpaca device. It will not be recognized by other Alpaca clients. It responds to the same door/shutter commands as the DOME device.
The AlpacaPi dome driver uses DC motors and a PWM controlled DC power board that handles reversing and power output. It also uses a terminal I/O board for connection to the DC controller and for sensor inputs. The sensor inputs are for door open and door close. Additional inputs can be used for positions in between.
The Raspberry Pi only has one PWM (Pulse Width Modulation) for speed control. I use one R-Pi for dome rotation and a second R-Pi to control the door. This allows the door controller to be mounted on dome and use wireless to talk to the dome rotation controller that is mounted on the wall.
Important Note:
The Raspberry Pi is 3.3 logic, the input pins cannot accept voltage higer than 3.3 and
the output pins only output 3.3 volts.
The switch inputs are designed to go through a normal open swith that switches to ground.
So the logic levels are inverted. Reading a logic 1 means the switch is open and a logic 0 means it is closed.
| Description | Power board | build / run commands | Notes |
|---|---|---|---|
| DC motor control |
 Click here for amazon description 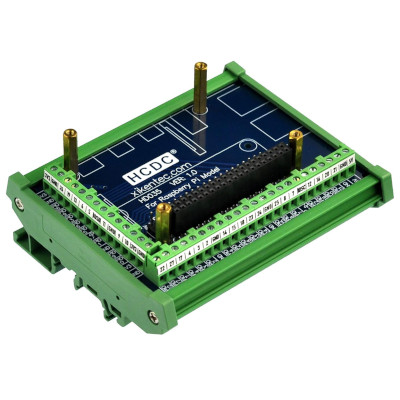 Click here for amazon description |
make dome |
| Raspberry-Pi Dome Driver | ||
|---|---|---|
| Hardware configuration | ||
| Clockwise button pin | 23 | Input |
| Counter Clockwise button pin | 24 | Input |
| Stop button pin | 25 | Input |
| Direction Control pin | 27 | Output |
| Power PWM pin | 18 | Output |
| Home Sensor pin | 5 | Input |
| Park Sensor pin | 6 | Input |
These drivers require the wiringPi library, to install this library, run this script
	cd AlpacaPi 		(if not already connected to the directory)
	./install_wiringpi.sh
to check to see if it worked properly
gpio readallYou should get an output that looks like this
 +-----+-----+---------+------+---+---Pi 4B--+---+------+---------+-----+-----+
 | BCM | wPi |   Name  | Mode | V | Physical | V | Mode | Name    | wPi | BCM |
 +-----+-----+---------+------+---+----++----+---+------+---------+-----+-----+
 |     |     |    3.3v |      |   |  1 || 2  |   |      | 5v      |     |     |
 |   2 |   8 |   SDA.1 |   IN | 1 |  3 || 4  |   |      | 5v      |     |     |
 |   3 |   9 |   SCL.1 |   IN | 1 |  5 || 6  |   |      | 0v      |     |     |
 |   4 |   7 | GPIO. 7 |   IN | 1 |  7 || 8  | 1 | IN   | TxD     | 15  | 14  |
 |     |     |      0v |      |   |  9 || 10 | 1 | IN   | RxD     | 16  | 15  |
 |  17 |   0 | GPIO. 0 |  OUT | 0 | 11 || 12 | 0 | ALT5 | GPIO. 1 | 1   | 18  |
 |  27 |   2 | GPIO. 2 |  OUT | 1 | 13 || 14 |   |      | 0v      |     |     |
 |  22 |   3 | GPIO. 3 |   IN | 0 | 15 || 16 | 1 | IN   | GPIO. 4 | 4   | 23  |
 |     |     |    3.3v |      |   | 17 || 18 | 1 | IN   | GPIO. 5 | 5   | 24  |
 |  10 |  12 |    MOSI |   IN | 0 | 19 || 20 |   |      | 0v      |     |     |
 |   9 |  13 |    MISO |   IN | 0 | 21 || 22 | 1 | IN   | GPIO. 6 | 6   | 25  |
 |  11 |  14 |    SCLK |   IN | 0 | 23 || 24 | 1 | IN   | CE0     | 10  | 8   |
 |     |     |      0v |      |   | 25 || 26 | 1 | IN   | CE1     | 11  | 7   |
 |   0 |  30 |   SDA.0 |   IN | 1 | 27 || 28 | 1 | IN   | SCL.0   | 31  | 1   |
 |   5 |  21 | GPIO.21 |   IN | 1 | 29 || 30 |   |      | 0v      |     |     |
 |   6 |  22 | GPIO.22 |   IN | 1 | 31 || 32 | 0 | OUT  | GPIO.26 | 26  | 12  |
 |  13 |  23 | GPIO.23 |   IN | 1 | 33 || 34 |   |      | 0v      |     |     |
 |  19 |  24 | GPIO.24 |   IN | 1 | 35 || 36 | 0 | OUT  | GPIO.27 | 27  | 16  |
 |  26 |  25 | GPIO.25 |   IN | 1 | 37 || 38 | 1 | IN   | GPIO.28 | 28  | 20  |
 |     |     |      0v |      |   | 39 || 40 | 1 | IN   | GPIO.29 | 29  | 21  |
 +-----+-----+---------+------+---+----++----+---+------+---------+-----+-----+
 | BCM | wPi |   Name  | Mode | V | Physical | V | Mode | Name    | wPi | BCM |
 +-----+-----+---------+------+---+---Pi 4B--+---+------+---------+-----+-----+
| Raspberry-Pi Dome Driver | |||
|---|---|---|---|
| Hardware configuration | |||
| Clockwise button pin | 23 | Input | |
| Counter Clockwise button pin | 24 | Input | |
| Stop button pin | 25 | Input | |
| Direction Control pin | 27 | Output | |
| Power PWM pin | 18 | Output | |
| Home Sensor pin | 5 | Input | |
| Park Sensor pin | 6 | Input | Specific to ExlporaDome implementation |
| Open Complete Sensor pin | 20 | Input | |
| Close Complete Sensor pin | 21 | Input | |
| Shutter Open Button pin | 13 | Input | |
| Shutter Close Button pin | 19 | Input | |
| Shutter Stop Button pin | 26 | Input | |
| Shutter Direction Control pin | 12 | Output | |
| Shutter Motor Control pin | 16 | Output | |
To build this version
	make clean
	make expdome
	./alpacapi-expdome

	Note: on some systems, sudo may be required, this is a wiringPi requirement
	sudo ./alpacapi-expdome
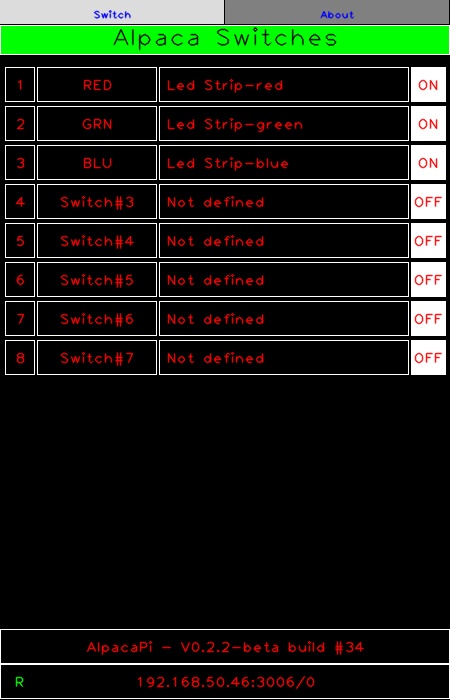
| Description | Relay board | build / run commands | Notes |
|---|---|---|---|
| 8 Relay DIN mount |
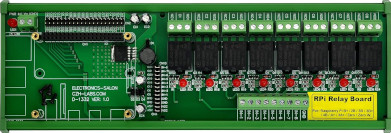 Click here for amazon description |
make piswitch8 |
|
| 4 Relay |
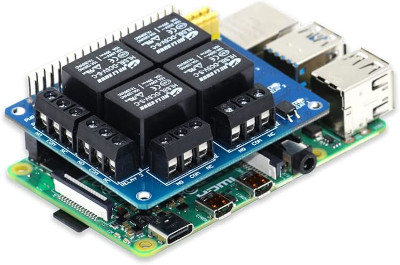 Click here for amazon description |
make piswitch4 |
|
| WaveShare 3 Relay |
 Click here for amazon description WaveShare product page WaveShare manual |
make piswitch3 |
This board has inverted logic to the relays. A logic "0" turns the relay ON. This may cause issues on start up. |
| keyestudio 4 Relay |
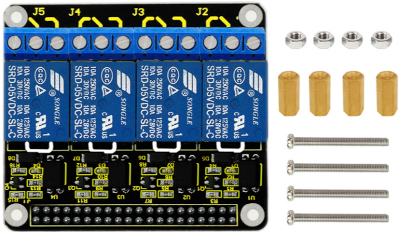
Click here for Amazon description Keyestudio 4 relay make piswitch4ks |